By: Madison Huggins ’20 and Spencer Klink ’20
It is hard to believe that the once sweltering heat has finally become a cool breeze, and the signs of fall’s arrival have begun to emerge. Upon us is the arrival of a season purely about embracing the warmth of nature around us, cuddling up in blankets with and giving thanks to the joys in life. This article shows four DIYs to sprinkle a little fall into Thanksgiving meals and spruce up holiday celebrations.
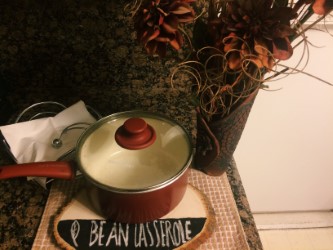
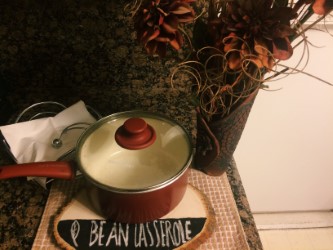
Tree slab food mats Credit: Madison Huggins ’20/SPECTRUM
Tree Slab Food Place Mats
Step 1: Head on over to a local craft supply store.
Step 2: In the wood section, there should be various sizes of rustic-looking wooden tree slabs. Of these choose the largest size (it will be used as a place mat).
Step 3: In the paint supply section, choose one to two bottles of standard black chalkboard paint.
Step 4: Using a ruler, draw a straight horizontal line across the middle of the wooden slab.
Step 5: Take the black chalkboard paint and fill in the space between the bottom of the slab and the drawn line.
Step 6: Wait three to four hours for paint to completely dry.
Step 7: Take a piece of white chalk and write the name of whatever dish that will be served on the painted half of the slab.
Sweet Sweater Pillows
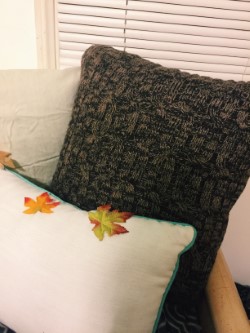
Step 1: Find an old sweater (preferably knit) somewhere around the house.
Step 2: Take a small to medium-sized throw pillow and slip the sweater around the throw pillow completely.
Step 4: Take the sleeves of the sweater and fold them behind the pillow (so they are not seen).
Step 5: Take two safety pins or hot glue and attach the sleeves to the back of the pillow.
Step 6: You now have your own cozy sweater throw pillow! Enjoy!
Fall Inspiration Board
Step 1: Travel to a local craft store or look around the house.
Step 2: Find a simple picture frame with a wide center and moderately thin rim.
Step 3: Go online or head out and find photos relating to fall. Family photos or portraits also work.
Step 4: Print out the images of choice and cut them out.
Step 5: Instead of eyeballing the width of frame’s center, take the cardstock that came inside that space and trace it onto a piece of paper. This way, the paper fits exactly into the frame with no problematic cutting.
Step 6: Position chosen images in any manner to form a collage.
Step 7: You can also add leaves, branches or flowers as an extra decoration.
Step 8: Place in a location where it can be viewed everyday!
Turkey Napkin Holders
Step 1: Visit a local craft store and purchase a packet of pipe cleaners of various colors.
Step 2: Bend five to nine pipe cleaners into teardrop-shaped loops to create the feathers.
Step 2: Cut out a small circle from brown construction paper and hot glue each pipe cleaner feather onto the back of the construction paper to form the body of a turkey.
Step 3: Cut a 1” wide strip of brown cardstock and fold the paper into a ring shape with a one inch diameter.
Step 4: Use hot glue to attach the construction paper and pipe cleaner feathers to the ring of paper.
Step 5: Cut a small orange triangle out of construction paper. Use craft glue to attach it to the bottom half of the construction paper circle. This forms the turkey’s beak
Step 6: Using more craft glue, attach two googly eyes to the top half of the construction paper circle.
Step 7: Place around the table for each seat.
